Tuesday, September 22, 2015

Making Friends & Tie Dye Outing


We had our first troop outing to earn our Making New Friends and Tie Dye patches.  This is on the Making Friends website www.makingfriends.com. Search the products for "Friend" or "tie dye" patch and they will come up.  

We tried traditional tie dye in ziplock bags and an alternative using sharpies and alcohol in a spray bottle.  It was really fun!

With the traditional method, I bought a kit with bottles, powder dye, and rubber bands. Use any kind of gloves. Cover the table with paper towels then put a plastic disposable tablecloth over it. Wear an apron and gloves.  

Empty the powder dye packet into the bottle, add water and shake. Then rubber band your shirt, place in a ziplock bag, as you squeeze the dye on the shirts.  Pinterest and the Internet and YouTube have great examples of how to make different designs.  Then you zip it shut and wait 6-8 hours, rinse the shirts with water until the water runs almost clear and the wash and dry normally.

The sharpie method is so incredibly easy. You take a cup, place it inside the shirt so the fabric lays on top, then place a rubber band over the top of the shirt and around the cup. Then draw designs with the sharpies. Get 70% alcohol and spray the design and wait a minute or two. The artwork will bleed into a beautiful watercolor design.
The Daisies and their moms loved it! We had a great time.
We had a makeup event for those that couldn't make the first one.  


Saturday, September 12, 2015

1st Daisy Troop Meeting

Our 1st Daisy Troop Meeting was a success! 

As the Daisies came in, they traced their handprints onto green felt for grass on our troop banner.  And the parents turned in their forms, registration fees and dues.  My Co-Troop Leaders took care of that as the Daisies congregated in our Daisy Friendship Circle on our sit upons.


We started with introductions. We each said our name and something we liked to eat.  Then I explained what Kapers are and asked for some Kapers to help bear the flag and lead us in the pledge of allegiance. Then we talked about the Daisy handbook and all the fun things we were going to learn this year. We reviewed the Promise, the Girl Scout sign, and the Girl Scout Law.

For the Promise, we passed out a laminated trefoil with the Promise printed on it. They strung a piece of yarn through it, write their names on it and wore them.


For the Law, I showed them a framed picture of the Daisy with each petal having a portion of the Law written on each petal.  We sang the Girl Scout Law song.  

Then we read the Lupe story about being Honest and Fair. Then we acted out the story. It actually worked well.

Then we stood up and stretched and did a craft. Our craft was to make painted wood flower bracelets on stretchy cord.

Then we ended with our Friendship Circle but standing and holding hands. I asked each Daisy to ask their parent to join us at the circle. Each Daisy introduced their parent and then we all said hello and the parent told us what they volunteered to do to help the troop.  I did this because every parent at least volunteered to do snack and I wanted to recognize everyone's contributions as well as place each parent with their child.

Tuesday, September 8, 2015

Troop Banner

Here's the Troop 447 Daisy banner made by one awesome Co-Troop Leader!!


Monday, September 7, 2015

SWAPS

What in the world are SWAPS? It stands for Small Whatchamacallits Affectionately Pinned Somewhere. Girl Scouts exchange them at any group event with other troops. So I was advised to have some ready.  

DAISIES
Remember how to make a snowflake cutout? That's how I made these daisies.  I made name tags for our first parent meeting.
  

But I made smaller versions that I laminated and pinned for SWAPS.


So take any size square paper and fold it matching opposite corners. 


Repeat by folding in half matching opposite corners.


Then turn the triangle upside down and fold it in thirds.


 Then you hold the single pointed corner, and cut off the dual points. 

Then, cut a leaf shape with the single corner (center of flower) pointed towards you and the triangle base away from you. Cut the point of the petal out of the base of the triangle.  Unfold your Daisy.


SMORES
OMG, I love these! I think we'll make them on our next family camping trip.  You'll need 
- bobby pins
- freeze dried marshmallows, and
- safety pin

First, hook the bobby pin through the loop of the safety pin. Then twist the bobby pin together leaving two prongs. 

I used a sharpened pencil and carefully "drilled" a groove into the marshmallows. 

Then I put glue on the hole and set the marshmallows on the "roasting stick" to dry.
Some of the Daisies squeezed their marshmallows or pushed them on and smushed them.  So remind them to gently set the marshmallows on the roasting stick.

Voila!  The cutest SWAP ever!

DAISY GS LAW BEADS
I made mini- laminated daisies just like above and punched a small hole for the safety pin. Then I cut green ribbon and had 12 colored beads from the Dollar Store.  We tied an end loop then strung the beads through the green ribbon and tied a square knot and a bow at the bottom.

COOKIE SHEETS

Another cute swap is a mini cookie sheet.  You'll need:
2"X1 1/2" squares cut from old cereal boxes
Aluminum foil cut large enough to wrap around the cereal box square
Tan foam hole-punched or cut into 1/4" circles
Black or brown sharpie
Glue
Tape
Hole-punch large and small holes

Take your cereal box square and wrap the aluminum foil around it is completely covered with one side smooth and flat. Tape the aluminum foil in the back side.  This is your cookie sheet.

Make your cookies by cutting out 6 circles about 1/4" wide or use a regular hole punch. I like how cutting the circles looks because they are slightly irregular shaped which makes it looks more authentic as homemade cookies.  But my Daisies can't cut such tiny circles so well so I think I will hole punch their cookies!  Add your chocolate chips by dotting the cookies with spots using your sharpie.

On the smooth side of the cookie sheet, glue the foam circles (cookies) onto your sheet. I glued 6 cookies but whatever fits in your cookie sheet.  Just remember to leave a space for a hole punch in a corner for the safety pin to fit through.

Punch a hole in a corner and insert your safety pin.


Saturday, September 5, 2015

Sit Upons

Sit Upons

I remember sit upons as a Brownie. Our meeting room for the Daisies is a finished concrete floor so sit upons are a must to be able to sit comfortably around the Daisy Friendship Circle.  

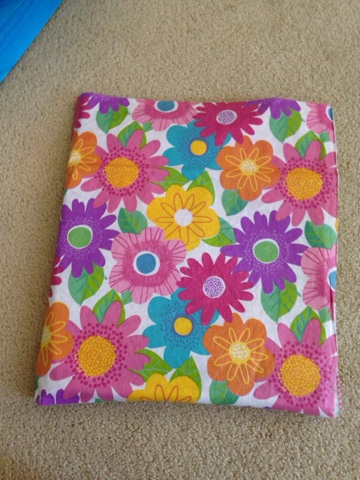
So I did not want to spend a lot of money. I bought a table cloth for $3.75 off Amazon, used an old foam playmat plus batting for the cushion and then duct taped the edges.


Of course I had to add the bows.  I'm going to have them make personalized name tags and I can tie them to the bows.

I put the loop in the corner so it's easier to carry them. They can hook it to a caribiner and hook it to their pant loop or clothes. And it makes it easier for me to carry to and from meetings.